lmportant Knowledge Points of Sheet Metal Bending
Minimum Bending Radius
The minimum bending radius is the radius of the inner fillet at the bend under the condition that the outer fiber of the sheet does not crack during bending. The minimum bending radius is only required when there are special requirements. In general, the bending radius should be enlarged as much as possible.
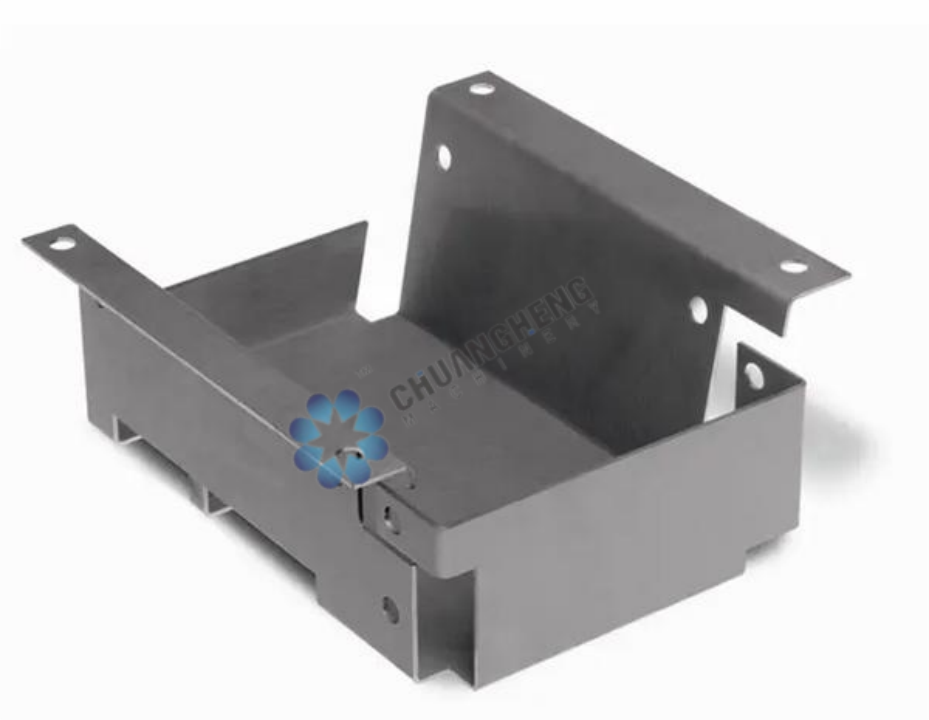
1.Minimum Hemming Height
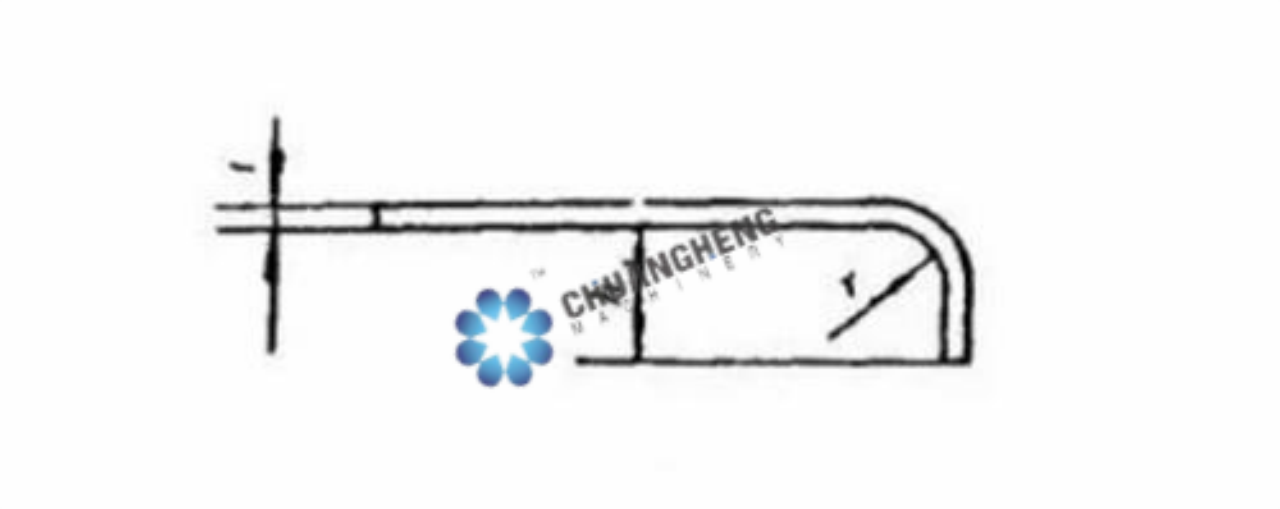
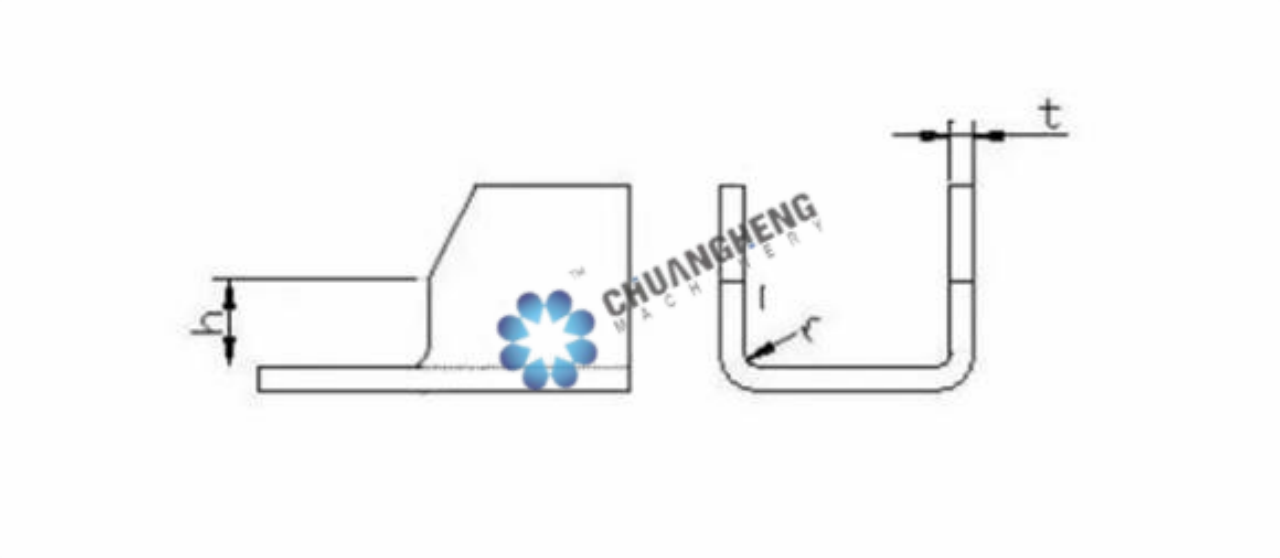
To ensure the bending quality of the workpiece. the straight edge of the bending part should not be less than the minimum edge height. When bending at a right angle as shown in Figure 1, the minimum folding height is as follows:
hmin=r+2t
2 .Folding height for special requirements:
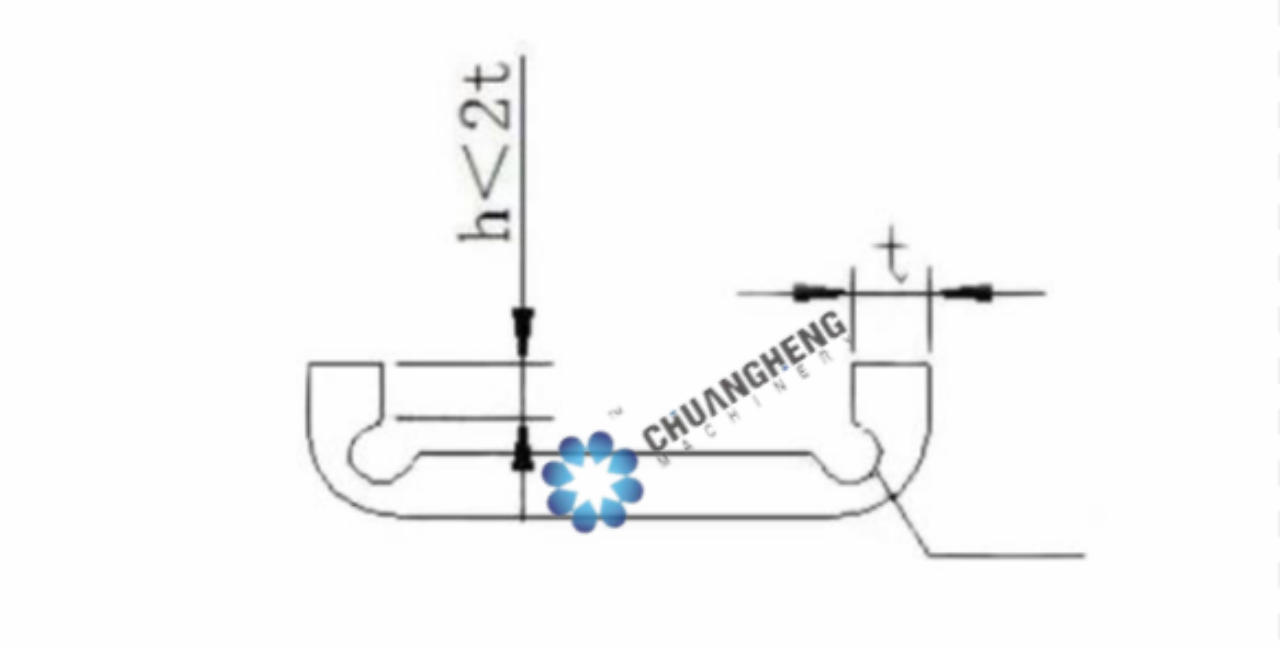
If the design requires the folding height hr+2t of the bending part, first increase the folding height, and then process it to the required size after bending: or in the bending deformation area After processing the shallow arc groove inside it is then bent. as shown in the figure.
3. The height of the straight edge with a bevel on the side of the bend.
When bending bent pieces with bevels on the sides. see figure.
The minimum height of the side is as follows.
hmin=(2 ~ 4)>3mm
Minimum Hole Margin
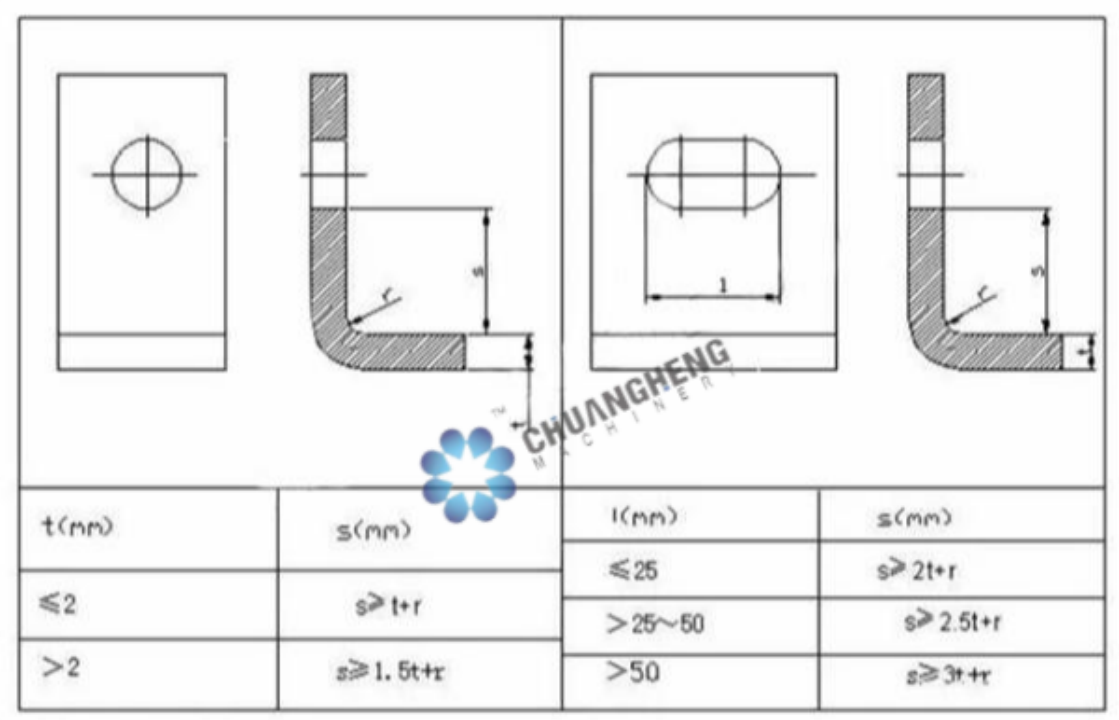
When there is a bending requirement after punching, the position of the hole should be outside the bending deformation zone to avoid deformation of the hole during bending. The distance between the hole edge and the inner surface of the curved edge is shown in the table:
Location of Bend Lines
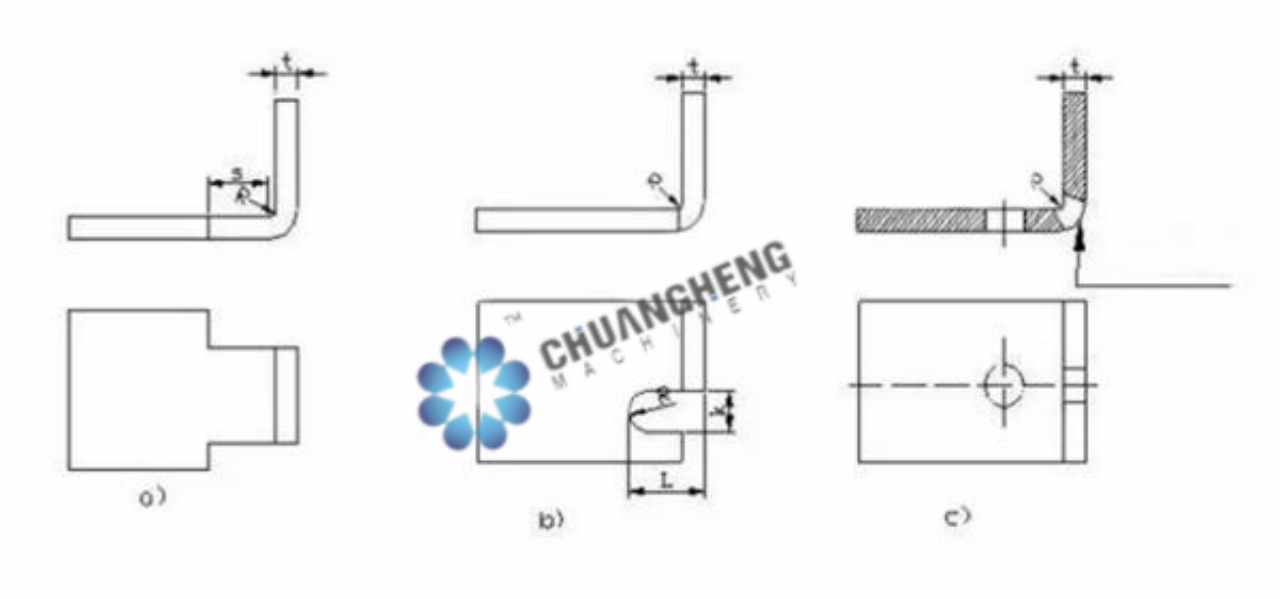
1.When bending a certain section locally, to prevent the stress concentration at the sharp corners of sudden changes in size from causing bending cracks, the bending line should not be at the position of sudden changes in size, and the distance S from the sudden change should be greater than the bending radius . as shown in the figure. r punch holes or slots to separate the deformed area from the non-deformed area. see Figure c, Pay attention to the size requirements in the figure: S≥R: groove width k2t: groove depth L 2t+R+k/2.
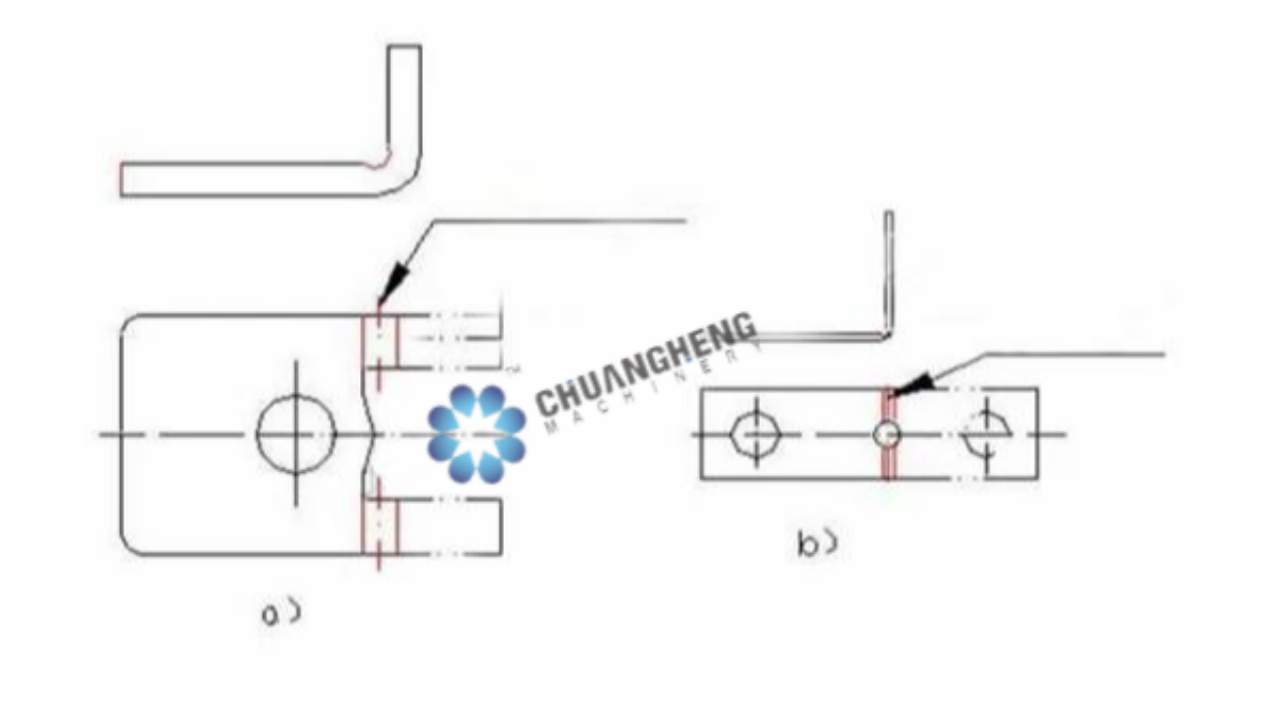
2.When the hole is located in the bending deformation zone. the process measures that should be taken before bending are shown in the figure.
Process Positioning Holes Should be Set in the Design of Bending Parts
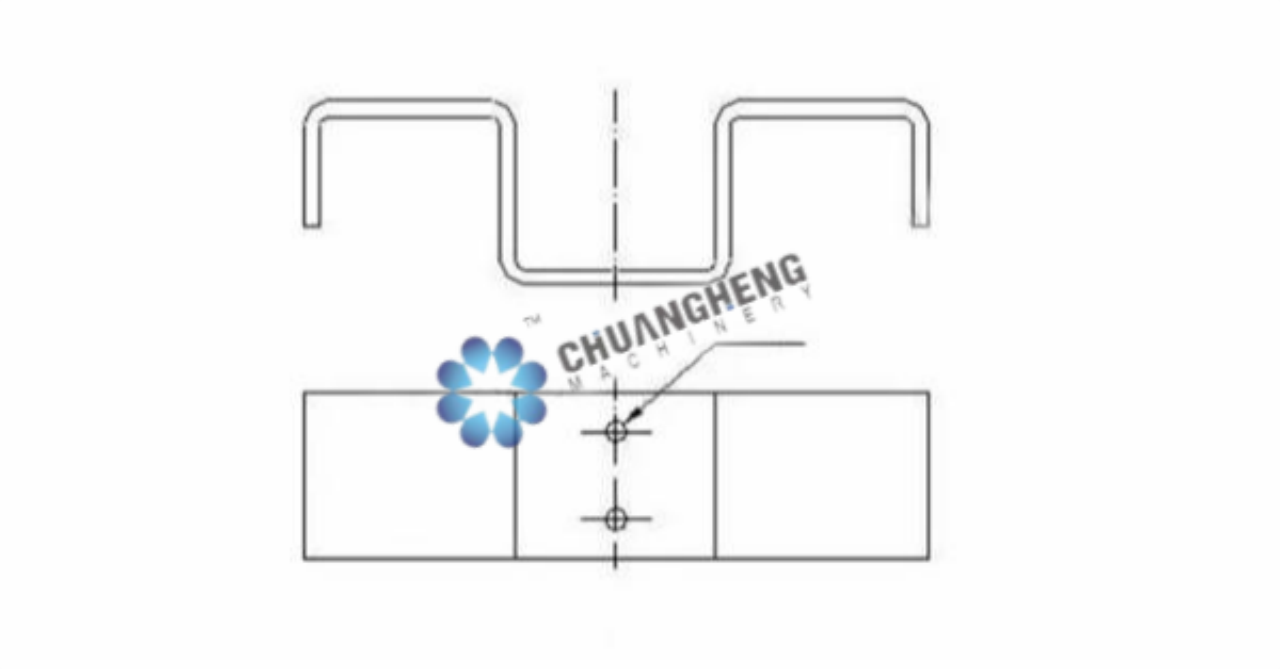
In order to ensure the accurate positioning of the plate in the mold and prevent the plate from moving and waste products during bending the bending parts should be designed with process positioning holes, as shown in Figure 6. ln particular, the parts that are formed by multiple bending must use the process hole as the positioning reference to reduce accumulated errors and ensure product quality.
